使用Pycharm開發第一支Python程式-Hello World
本篇簡單說明如何使用Pycharm來開發Python程式,
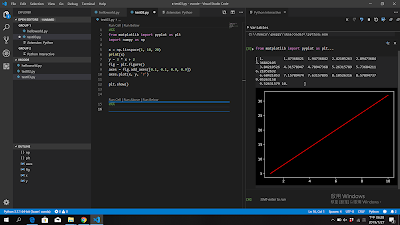
以下是建立.py與執行的步驟:
1. File-->New project

2. 在helloworld資料夾右鍵,出現下拉選單,選擇-->New-->Python File

3. 填上檔案名稱

4. 在程式碼中填入print("Hello World!")

5. 在helloworld.py上按右鍵,出現下拉選單,選擇Run 'helloworld'

6. 下方視窗即出現執行結果。

以下是建立.py與執行的步驟:
1. File-->New project

2. 在helloworld資料夾右鍵,出現下拉選單,選擇-->New-->Python File

3. 填上檔案名稱

4. 在程式碼中填入print("Hello World!")

5. 在helloworld.py上按右鍵,出現下拉選單,選擇Run 'helloworld'

6. 下方視窗即出現執行結果。


留言